La Lady Madonna is a graceful and mysterious Hand Carved Mango Wood Santos offered by Create-ologie. It is one of those items that you fall in love with at first glance. It's serene beauty is edgy and romantic all at once. There are certain pieces that have the ability to capture your eye, heart and imagination. It has been my experience that when you find something that special you make room for it, even if something else has to go!
It's a modern piece with the look of a centuries old relic that once belonged in an archaic basilica in Europe. It is rich in detail and has a very tactile surface... Just ripe for embellishment! Of substantial proportions standing at a generous 25 1/2" tall, with articulated arms, soulful glass eyes and angelic zinc colored tin wings.
Wonderfully grandiose all on its own but if you really want to dress it up a bit you can create the illusion of a priceless artifact....
by seeing things not just as they appear but for what they can become....
with just a few simple modifications and a personal touch.
Create a sparkling crown (that is just the right size btw) out of a paper towel tube and the plus is it's a great way to reduce, reuse, recycle! With an ink pen draw the outline of a crown on the paper towel tube all the way around, the end of the tube will become the base of the crown. Don't worry about the ink lines showing, paint will cover them. Cut out the peaks,
use gold acrylic paint making sure to paint the inside of the crown as well. Let dry thoroughly, then coat the entire crown with a thick layer of decoupage glue. I use an old paintbrush to do this. Fold a sheet of paper in half and place under the crown to catch the extra glitter so that you may reuse it. Sprinkle fine glass glitter all over until the crown is well coated inside and out. Let dry. You can further embellish your Santos crown by adding colored glass gems, freshwater pearls, rhinestones or even dried flowers if you like.
Next lets make a halo wreath out of vintage glass beads and some craft wire, just cut a length of wire large enough to fit around her head leaving a few inches on either side, slide on a collection of old beads and twist the ends closed to secure it. Another variation would be to use tiny dried rose buds in place of the beads for a more natural earthy effect.
Enveloped in lace, dress your lovely lady Madonna in fine frippery. I used my stash of antique lace fragments, my most precious bits to create an enchanted tattered patchwork frock. To give the gown a rustic, haphazard look use tiny gold safety pins (tip: if you soak them in vinegar overnight they will tarnish nicely) and just loosely pin here and there in strategic places till her robe stays where you want it. Here is another opportunity to really personalize this and make it one of a kind.... fashion a ruffled Elizabethan style collar to place around her neck to create a truly royal scene!
You can even make an array of mini paper paddle masks out of antique engravings and long wooden craft sticks (like the ones used to stir latte)
add velvet ribbons and don't forget to cut out holes for the eyes! Use these theatrical little props to change her look every now and then. Isn't this fun?! Lets keep going, there is so much more Create-ologie to explore!
Now lets imbue her with an intriguing expression.... No need to tense up now, this will be really easy. Using acrylic paints and a fine paintbrush just follow the lines and groves that are already there to add realistic lips, nostrils, eyebrows and creases on the eye lids.
Heaven is in the details...
Also paint around the inside of her ears, along her collarbone,
hands and fingernails too. Take a toothpick dip the end in red paint and add two tiny dots to the inner corners of the eyes (this is the way antique dolls were painted) and it really adds to the overall total effect you are creating.
Use an emery board to very gently "sand" off some of the paint (creates an aged patina) over lips, eyebrows, etc. Change her skin tone by giving her a rosy glow using a cotton ball and some of your own makeup, blusher dabbed onto cheeks, collarbone, ears and tops of her hands. I also added some dark grey eye shadow on the eye lids as well.
Here is another opportunity to truly customize this piece to coordinate perfectly with your home decor. I applied a light wash of turquoise acrylic paint with a sponge onto certain areas of her torso, arms and skirt. Bring her to life with a hand painted flaming heart, you can even decoupage a heart image on as well. If you want to take it a step further use paper clay to sculpt a puffy flaming heart directly onto the Santos.... just thinking out loud now but this gives me many more ideas for embellishing another Santos figure! Another tip would be to experiment with crackle paints, like on the skullcap or the "floor" area of the base (black and white checkerboard pattern?!) for example or decoupage newsprint or antique book pages onto the base.
Bend the tin wings slightly back to create the feel of motion and movement.
I used packing excelsior to create a "just uncrated" look and set this scene up in one corner of my studio, I'm going to use this Santos as a jewelry holder for lots of necklaces. You can even create a backstory for her. Give her a name and an honorary position in your studio like The Guardian of Creativity, a roll I'm sure she will be happy to take on!
I had so much fun working on this piece I'm going to order several more and paint them in a variety of colors to create an "instant antique" collection at a fraction of the price and have a blast customizing each and everyone. Always remember.... Creating is a form of play, yet it is so powerful that it can mend a broken heart and set your imagination soaring! Create-ologie Love!! Visit the Create-ologie web site to purchase one of these wonderful Santos figures of your very own. I have a special 10% off discount coupon code for you as well, just type SandraEvertson in the coupon area when you check out. To keep updated on all the exciting new things Create-ologie has to offer be sure to visit the Create-ologie blog, until next time, have fun creating!!
skip to main |
skip to sidebar

Eye was thinking...




















Professional Daydreamer, Artist, Designer, Author
About Me

- Sandra Evertson
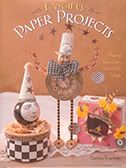
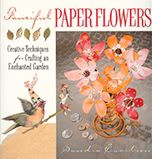
- There was a single specific moment in time when it struck me, " I just might be an artist." And I must admit it was quite a relief. This explains everything, it all makes perfect sense now. Those frantic urges to quickly search out paper and pen, a lack of attention for the ordinary and mundane but endless patience and diligence for anything frivolous or impractical. Then there are those impulses bordering on near obsession to collect antique oddments. I've been a gatherer all my life which is where the idea for my new RELICS & ARTIFACTS craft blank collection began. I've partnered with PRIMA MARKETING INC. to release this uniquely beautiful line. Timeless and classic curated arrangements of matte resin castings ready to be re-imagined in any number of ways, altered art, jewelry, mixed media, just decorate and embellish with your favorite medium. I am also a Contributing Editor to WHERE WOMEN CREATE, WHERE WOMEN COOK and WWCBUSINESS magazines. I've authored several best selling craft books including FANCIFUL PAPER PROJECTS and FANCIFUL PAPER FLOWERS. I have created several popular rubber stamp lines exclusive to STAMPINGTON & COMPANY.

Eye was thinking...
Flashback
Mini Moment
Currently Seen In ...

.

.

.

.

.

.

.

.

.

.

.

.

.

.


Bengals Illustrated Article


Creative Places
- *Where Women Create
- *Where Women Create the Blog
- A Faerie Tale of Inspiration
- A Gilded Life
- Adored Before
- Adorned by Morgan
- Alannah Hill
- Alberto Cabornero
- Amber Dawn
- Amusements
- Amy Hanna
- Ana Juan
- Anahata
- Anna Corba
- Anna Lorich
- Art and Ghosts
- Art Decadence
- Art n Sewl
- Artista Muvek
- Artsortments
- Artsy Mama
- Ascender Rises Above
- Attic Babys
- Babes from the Woods
- Basia Zarzycka
- Bayou Contessa
- Beautiful Art
- Belgian Pearls
- Belinda Schneider
- Bibliodyssey
- Bird in the Hand
- Bird Tweets
- Black Eiffel
- Bland Rosor & Tistlar
- Bloom & Bee Swanky
- Blue Muf's Corner
- Bluebird Notes
- Boxwood Cottage
- Brocante
- Broken Memories
- Brooke Giannetti
- Burned Furniture
- Calamity Kim
- Carolyn Westbrook Home
- Carriage House Samplings
- Castle in the Air
- Celebrate Creativity
- Cerfapaillettes
- Charlotte Lyons
- Christen Olivarez
- Christine Clemmensen
- Christine LeFever
- Cindy Petters
- Colleen Moody
- Cori Dantini
- Cottage Way of Life
- Country French Antiques
- Cowboys and Custard
- Creative Solace
- Creative Therapy
- Creativity Unleashed
- Cupcakes for Clara
- Curious Sofa
- Daily Coyote
- Dawn Houser
- Debbee Thibault
- Debbie Trotter
- Delaney Gates
- Designs by C K
- Di Overton
- Diana Evans
- Diana Muse
- Dirty Pretty Things
- Dispatch from L. A.
- Doll Face Design
- Dolls and Thoughts
- Dolls from the Attic
- Dollybelle's Peepshow
- Dominion of Light
- Donna O'brien
- Down Abbies Road
- Dreams and Ghosts
- Dubuhdu Designs
- Eddie Ross
- Edgar and Edgar
- Elcollage
- Elizabeth House
- Enzie Shahmiri
- Erika Napp
- Etoiles et Toiles de Fine Bessot
- Fabulous Fifi
- Fabulous Finds and Co.
- Fabulously French
- Faerie Window
- Fanciful Designs
- Fanciful Twist
- Farmer Julie
- Fete et Fleur
- Fig Tree & Co.
- Frederic Clement
- French General
- FrenchBlue
- From the House of Edward
- Funky Finds
- Gail Lackey
- Giuseppina Cirincione
- Go Native Toys
- Goldbug Studio
- Gossamer Designs
- Gumball Grenade
- Heather Bullard
- Homemade Circus
- Hop Hop Jingle Boo
- I dreamed I saw
- I'm Smitten
- Impasse de Pas Perdus
- Ink Vanilla
- Inspire Company
- Itkupilli
- Izabella's Blue
- James Coviello
- Jean Baptist Astier de Villatte
- Jen O'Conner
- Jenny Doh
- Jenny everyday
- Jill Marie Shulse
- Jo Blogs UK
- Jo Packham
- Joanna Figueroa
- Johanna Parker Design
- Johanna Spinks
- Joseph Cornell
- Josie Baggley Company
- Judy Phipps
- Julia Van Der Werf
- Julie Bergmann
- Julie Collings
- Julie Morstad
- June Clinkscales
- Just Giddy
- Kakoueda
- Karima Cammell
- Kathleen Rietz
- Kathy Ruttenberg
- Kathy Womack
- Keith Lobue
- Knits Steel
- Koldo Barroso
- Kristen Robinson
- Kristin Hubick
- La Dolce Vita
- La La La Illustration
- La Source aux Bois
- Ladonna Welter
- Lady's Repository Museum
- Land of Nod Studio's
- Le Divan Fumoir
- Le Fresne's Castle
- Le Petit Cabinet de Curiosites
- Len Davis
- Lilliy's of Londonish
- Linda Crispell
- Lindsey Lane
- Liquid Sky Arts
- Lisa Falzon
- Lisa Hoffman
- Lisa Kaus
- Little French Garden House
- Little Melfred's Studio
- Lola Enchanted
- Loretta Lux
- Louise Love
- Lynne Perrella
- Ma Petite Theiere
- Mademoiselle Ombrelle
- Maggie Taylor
- Magnolia Pearl
- Maison Douce
- Malphi
- Manon Doyle
- Marie Louise Sundqvist
- Marie Patterson
- Marion Peck
- Marmee Craft
- Mary Andrews
- Mary Engelbreit
- MaryJanesFarm
- Mealy Monster Land
- Melissa Tereck
- Memoires
- MendyTexas
- Merveilles en Papier
- Metamorphosis
- Middle of No Where
- Mikel Robinson
- Miss Maddies
- Missy Sue Studio
- Misti Rose
- Mockingbird Hill
- Mod Podge Rocks
- Monica Indelicato
- Morgaine le Fay
- Moss Hill
- Murphy Bears
- My Minutia
- Nancy Wiley
- Natasha Fadeeva
- Nicol Sayre
- Nini Violette
- Noodle and Lou
- Oh So Pretty
- Old Flowers 4 Me
- Paige Hill
- Pam Garrison
- Pamela Huntington
- Pandoras Parlor
- Paper Relics
- Paper Snitch
- Paper Whimsy
- Papercuts by Joe
- Paris Hotel Boutique
- Paris Parfait
- Paula Nerhus
- Peacock Park Design
- Peng Peng sock monkey
- Peter Hollinghurst
- Piggy's Tales
- Pink Pomegranate
- Polly Becker
- Pomegranita
- Pretty Petals Boutique
- Puppychick
- Quilts of Gee's Bend
- Raised in Cotton
- Rebecca Ersfeld
- Rebecca Sower
- Red Lips 4 Courage
- Red Velvet Creations
- Remnants of the Past
- Robin Vanvalkenburgh
- Robins Egg Bleu
- Rochambeau
- Romantic Homes Magazine
- RRR
- Ruth Rae
- Sadie Olive
- Sally Jean Alexander
- Sam I am Creations
- Samy in Wonderland
- Sandy Berry
- Sara Singh
- Sarah Kaye Gallery
- Scarlett Clay
- Scrapbook
- Sea Angels
- Sepia Art Studio
- Sharilyn Miller
- Sherbet Blossom
- Shona Studio
- Sid Dickens
- Simple Joys
- Sis Boom
- So Easy Life
- So Inspired
- So Shelli
- Something Sublime
- Sparrows Cottage
- Speckled Egg
- Spirit and Kitsch
- Stampington
- Steam Punk Workshop
- Stephanie Rubiano
- Susan Tuttle
- Swan Bones
- Sylvia Anderson
- Tammy Gilley
- Teena Flanner
- The Architect's Brother
- The Enchanted Room
- The Good Wife of Washington County
- The Graceful Lady
- The Happy Zombie
- The Hermitage
- The Inspired Room
- The Old Pretenders
- The Paris Apartment
- The Pastoral Dollmaker
- The Pioneer Woman
- The Polka Dot Pixie
- The Powdered Wigs
- The Vintage Dragonfly
- Thimbleanna
- Tilly Bloom
- Time with Tascha
- Tinsel Trading Company
- Tinsell & Whimsy
- Tongue in Cheek
- Touch of Vaudeville
- Tout Ce Qui Brille
- Tristan Robin
- Two Dresses Studio
- ullabenulla
- Undercover Caravan
- Upper Case
- VE Thoman
- Victoria and Richard MacKenzie-Childs
- Vignettes Antiques
- Vintage Delights
- Vintage Image Craft
- VL. Designs
- Walter Chen
- Wanderlust n' Pixie Dust
- Wealthy's Bonnet
- Wendy Addison Theatre of Dreams
- Whendi's Bears
- Whimsical Bohemian
- Whimsy Dreams Studio
- William Dunniway
- WoolyTales Miniatures
- Xavier Salomo
- zuzu
copyright notice
all content © Sandra Evertson
2008
all rights reserved


